Thursday, March 29, 2012

Gluten Free Chewy Bars

Eating on the run has been my biggest issue since going gluten free.  I inevitably find myself out running errands or between meetings when I realize that I’m starving and there is nowhere to buy anything “safe”. 

For a while, I thought I could get away with eating Clif Bars because they didn’t list any wheat products on the label.  When they started to irritate me I did a little research and figured out that the malt ingredients were probably the culprit.  Disappointed that such a convenient, delicious and purse-friendly food was now off limits, I set out to make my own and I think I’ve done pretty well.  They are moist, chewy and dense like the Clif Bar and don’t crumble or fall apart after rattling around in my purse for a few days.  They are also butter and oil free and sweetened with agave which is super low on the glycemic index. 
This is my new baby... other than my Kitchenaid stand mixer, this is my absolute favorite kitchen appliance!


Ingredients:


1 cup Gluten Free corn flakes (I love this brand, regular corn flakes contain malt so they are NOT gluten free)
1 cup pitted dates
1/2 cup dried apples
1/2 cup unsweetened coconut
1/2 cup pecans
1/3 cup agave nectar

2 tablespoons honey
2 tablespoons maple syrup
2 tablespoo
ns peanut butter (or other nut butter)
1 teaspoon vanilla (optional)


Preheat oven to 350F.


Place dates in a small bowl, add 1/4 cup hot water and allow to soak for 10 minutes, then drain.  I did some apricots in this batch because I was a little short on dates


In a food processor, combine all ingredients, pulsing until you have a consistent texture but with some pieces of date, apple and pecan still visible.

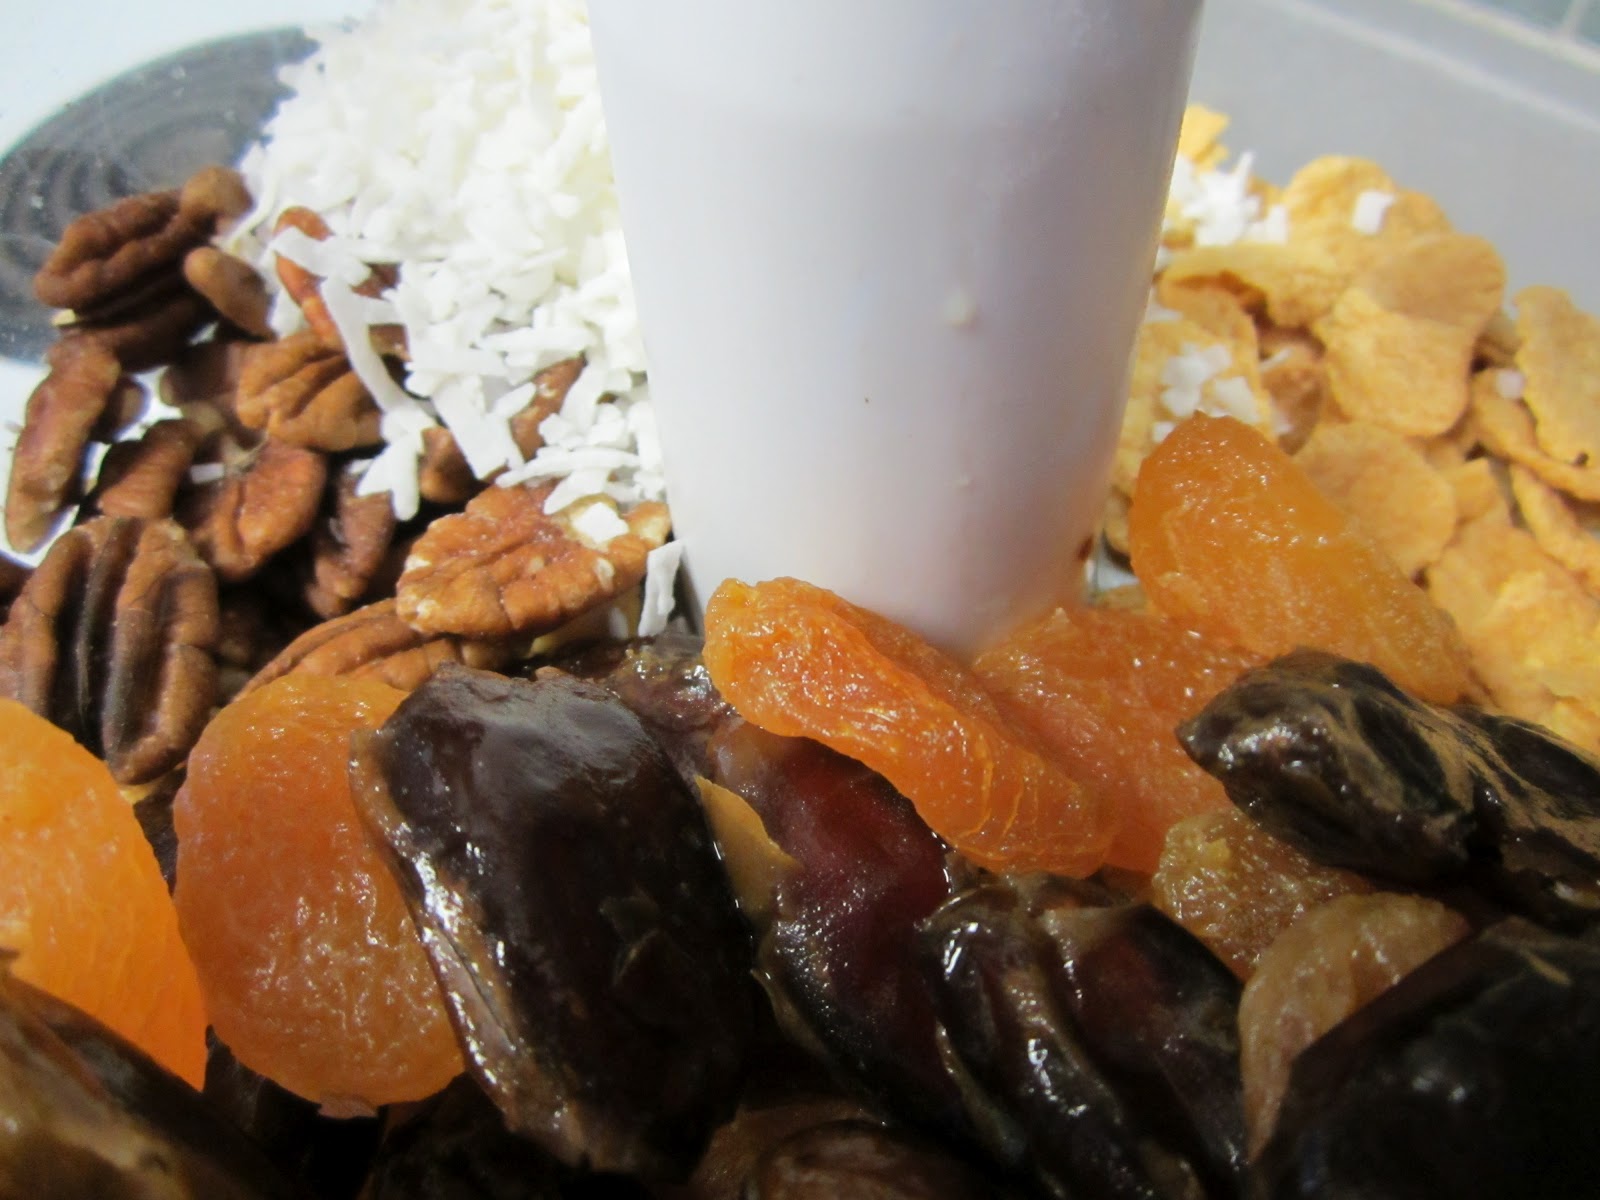


Press mixture into an 8x8 pan lined with parchment paper.  If you don’t have an 8x8 pan you can use a larger pan but simply not fill the whole thing.  The bars will not spread in the oven so it’s alright to leave some space.


Bake 20-25 minutes, until golden brown. Lift from the pan using parchment paper and allow to cool for 5 minutes before cutting.  I usually cut into 8-10 bars depending on thickness.


I put a few in a Ziploc bag in the cupboard for enjoying at home and wrap the rest tightly in plastic wrap so that I can throw one in my purse before I head out somewhere. 


These haven’t lasted past 6 days with me because they are so delicious but at that point they still tasted fresh. I would assume you have a good week or so to keep them, as long as they are sealed in plastic wrap or an air tight container.  These can also be tightly wrapped and frozen for longer storage.  Allow to thaw at room temperature.


Tuesday, March 6, 2012

Flaky Gluten Free Pie Crust & Bonus Gluten Free Greek Pie

For months, I have been looking for the perfect flaky gluten free pie crust recipe.  All of the recipes that I tried could only be described as terrible.  Many GF crusts never came together and called to be “pressed” into the pan like you would a graham cracker crust and didn’t have that layered consistency that produces a flaky, tender crust. 
This recipe is a combination of several that I came across with a few additions of my own.  I have made it 3 times now, always for people who can have gluten and nobody has been able to tell the difference.  Even my mother, the master of traditional pie crust and a self proclaimed pastry snob enjoyed it.
                                                         Gluten Free Apple Pie
This recipe makes enough for 1 double-crust pie.
  • 1 cup white rice flour
  • 1/2 cup potato starch
  • 1/2 cup corn starch
  • 1/4 teaspoon salt
  • 1 tablespoon sugar
  • 1 teaspoon xanthan or Guar Gum
  • 1/4 teaspoon baking powder
  • 1/4 cup cold butter, cut into small pieces
  • 1/4 cup shortening, cut into small pieces
  •  large egg, beaten
  • 2 teaspoons vinegar (apple cider or white)
  • 1-3 tablespoons ice water, as needed
  • 1 teaspoon honey (optional- great if you’re making a sweet pie)
1.     Combine rice flour, potato starch, corn starch, salt, sugar, xanthan or guar gum and baking powder in a large bowl and whisk to aerate and mix thoroughly

2.     Using a pastry cutter (or two butter knives), cut in butter and shortening until all flour mix is incorporated and in small pea sized bits

3.     Whisk egg, vinegar and honey (if using) in a separate bowl and then incorporate into mix with a fork, follow with 1 tablespoon of water at a time until dough comes together into a ball
4.     Wrap in plastic wrap and chill for a minimum of 1 hour
5.     Divide dough in half (wrap and refrigerate or freeze second half) and roll out between 2 pieces of parchment paper or plastic wrap.  Transfer to pie plate by removing top layer of plastic wrap, flipping into plate and peeling off bottom wrap
If making an unfilled crust, prick bottom with a fork several times and bake at 425 degrees for 12-15 minutes, otherwise prepare according to pie recipe you are using.  If you only require a single crust, this can be frozen in a ball and thawed and used at a later date.  Be sure to leave time to defrost either in the fridge (ideal) or on the counter.  You never want to microwave pie crust to defrost, it will ruin the consistency.  If you have extra pie plates or use the disposable foil kind you can definitely roll out the crust and freeze in the pie plate.  The advantage of this is you can also cook from frozen!
To get you started, here is my recipe for “Greek Pie”. The flavours in this Quiche are reminiscent of Spanakopita, which is super popular with my friends when I serve it at parties.  This recipe can also be made into mini quiches for a terrific appetizer.
Greek Pie
  • 1 batch Flaky Gluten Free Pie crust (reserve half for later use)
  • 4 eggs
  • 1/3 cup sour cream (ideally not fat free)
  • 1/4 cup milk or water
  • 1/3 cup crumbles feta cheese
  • 2 cups spinach, wilted or 1/4 box frozen spinach, defrosted and squeezed dry in a kitchen towel
  • 1 teaspoon dry dill (2 teaspoons if using fresh)
  • salt & pepper to taste
  • 1 medium tomato (optional)
Preheat oven to 350 degrees
1.     Roll out pastry dough and line an 8-inch pie plate or tart pan
2.     Crumble feta cheese into pie, covering the base of the crust evenly.  Add spinach in even layer on top of cheese
3.     In a bowl, combine eggs, sour cream, milk, dill, salt and pepper with a whisk until combined and no streaks of yolk are present.
4.     Pour egg mixture over cheese and spinach
5.     Thinly slice tomato and layer on top of egg mixture in concentric circles to cover entire surface of the pie (I only had cherry tomatoes so mine wasn't as pretty this time)
6.     Bake for 35-45 minutes until puffed and golden brown and fully set in the center

Wednesday, February 29, 2012

Gluten Free Fresh Pasta

I was never a big pasta eater.  Not that I didn’t eat it but it’s not one of those things I’ve ever ordered in restaurants as I always tend to order something I couldn’t or wouldn’t make at home.  All of this changed when I made the switch to gluten free.  Suddenly, a food that I had taken for granted was forbidden … and was all that I wanted. 

Below is a recipe that I can’t take the credit for as I found it in various bits and pieces online but I will say that I have made it 3 times now and it is absolutely wonderful.  Unlike any other gluten free baking you may have done, this pasta handles and stretches like a dream.  I have used it for both fettuccini (or as close as I can get to fettuccini without a pasta cutter) and for ravioli. Both times the results blew me away!

  • ½ cup tapioca starch
  • ½ cup cornstarch
  • 3 tablespoons potato starch
  • ¾ teaspoon salt
  • 4 ½ teaspoons xanthan gum
  • 3 large eggs
  • 1 ½ tablespoons vegetable oil

Directions:

In a medium bowl, combine flours, salt, and xanthan gum.
Beat the eggs lightly and add the oil.
Pour the egg-oil liquid into the flour mixture and stir.  It will start to feel much like pastry dough.
Work the dough into a firm ball and knead for about 30 times

Place the ball of dough on a potato starch-floured (rice flour turns noodles gray) breadboard and roll as thin as possible

This dough is tough and, when almost transparent, will still handle well. Cut into desired shape. 

I personally am DYING to buy one of these for my Kitchenaid mixer so that I can make all sorts of shapes:


For Fettuccine and Spaghetti, slice very thin strips by hand or use a pasta or pizza cutter.
If using for Lasagna, cut into 1 1/2-by-4-inch rectangles.
To make Ravioli, simply cut into 2x2 inch squares and place a small amount of filling in the middle.  With a wet finger or pastry brush, dampen the outer edge of the square and place a second square on top.  Working from the center out, ensure that there is no air trapped with the filling and seal the edges by pinching them together.

To cook pasta: Cook in salted boiling water, to which 1 tablespoon of oil has been added, for about 10 to 12 minutes depending on the thickness and size of your pieces.  To test, pull a piece out and try it!
I find this recipe makes a fairly small batch of pasta (at least I think it does) maybe enough for 4 servings.  If you’re like me and like to do big-batch production, double or triple the recipe.  Pasta keeps well in the fridge for about 3 days but freezes exceptionally well.

Freezing:
Lay fresh pasta in a single layer on a potato starch-covered baking pan or a non-stick mat and place in the freezer for about an hour to harden. Transfer to freezer bags or containers and return to freezer.  For long pastas like fettuccini, it is best to twist the pasta strands into a sort of nest on the baking sheet before freezing.  Even better, can be cooked from frozen!

Thursday, February 23, 2012

Gluten Free Cheddar Corbread Muffins

It’s incredibly cold outside. It is the kind of night where you rush home from the office, change into something cozy and park yourself on the couch for some TV and comfort food - the more carbs the better.  Before going gluten free, my idea of the perfect meal for tonight would have been a big hunk of crusty bread to dip in a hot bowl of hearty soup.  As you may have noticed, traditional gluten free bread is sadly lacking on the crusty and chewy front.
Cornbread is a great alternative and with its hearty quality, it’s perfect for dipping but still moist enough to be eaten on its own.
I like a fluffier texture as opposed to the grainy traditional kind, because of this; you’ll notice the ratio of flour to cornmeal is higher than other recipes.
Cornbread
1/4 cup butter (room temperature)
3 tablespoons sugar
2 eggs
1/2 cup sour cream
1/2 cup milk
¼ cup potato starch
2/3 cup yellow cornmeal
2 teaspoon baking powder
1/2 teaspoon salt

Topping
6 Strips of bacon (cooked and chopped coarsely)
1 cup grated cheddar cheese

Preheat oven to 425°F. Combine butter and sugar in large bowl. Beat at medium speed, scraping bowl often, until creamy. Add eggs; mix well. Stir in sour cream and milk. Reduce speed to low; add all remaining ingredients. Beat just until mixed.


Pour batter into greased muffin tins and top generously with bacon and cheddar cheese. Bake for 16 to 18 minutes or until golden brown and toothpick inserted in center comes out clean. Serve warm with butter. 

Like it spicy?  Finely chop a medium Jalapeno pepper and stir into batter before scooping into the muffin tin.


Be sure to vote on the top right for which recipe you would like to see next on Gluten Free Kitchen Adventures!

Friday, January 27, 2012

Gluten Free Lemon Blueberry Pound Cake

Ok so I know that I promised bacon cheddar cornbread muffins but in my attempt to get home and out of the cold quickly, I forgot to pick up cheddar cheese... and bacon.  As I am missing two of the main tasty-making ingredients and I have no desire to go back out, I figured I would whip up another recipe with things I have around the house. 

I look in the fridge, eggs, bok choy, feta cheese, lemons, blueberries...  thinking, thinking... I've got it! Pound Cake!  A summer treat on a wet, cold winter's night never hurt anyone, right?

Lately I have been experimenting with another flour mixture for lighter pastries, something that would serve to replace your traditional cake flour.  The difficult part of getting this mix right has been getting it fine enough without creating paste.  Rice flour lends a nice light texture but is too fine to be used on it's own and many of the others are too course and create a grainy texture.  Through trial and error I think I have come up with a pretty great alternative. 

Gluten Free Cake Flour (yield 1 cup, multiply as needed)
1/2 cup Fine White Rice Flour
1/4 cup Sorghum Flour
1/4 cup Potato Starch
1 tsp Xanthan Gum


For the pound cake, you won't need to use this flour exclusively but adding it into the mix lends a lovely fine texture.  Using a combination of cake flour and the Gluten Free All-Purpose Flour that you already have in your pantry is just about perfect.

Gluten Free Lemon Blueberry Pound Cake
·  1/2 cup gluten free all-purpose flour
·  1 cup gluten free cake flour
·  1 1/2 cups white sugar
·  1/2 cup butter
·  1/2 cup sour cream
·  3 eggs
·  1 pinch baking soda
·  juice and zest of 1 large lemon
·  1 cup blueberries

  1. Preheat oven to 375 degrees F. Grease and a 8x4 inch loaf pan
  2. In a large bowl, cream butter and sugar until light and fluffy. Add sour cream, lemon juice, zest and eggs, mix to combine
  3. Add flours and pinch of soda, mix well.  Fold in blueberries and pour into prepared pan


  1. Bake for 50-60 minutes, or until a toothpick inserted into center of cake comes out clean


The result is a beautiful, tart loaf with a moist and creamy texture.

Enjoy!

Very soon I promise to pick up some bacon and cheese for the corn muffins! And be prepared, after that is my new addiction, fresh gluten free pasta.

Gluten free confession: Ok. Today was rough and like every good junkie, I like to justify why I DESERVE something that I know isn’t good for me.  At lunch I met my wonderful friend Heather at Hero Burger because I have recently discovered that they offer GF buns! Very Exciting!  While scanning the menu board, the world froze for a moment as my eyes met “Onion Rings”... my decision was made.  For some dumb reason I still had a GF bun though and I thought that it would make a difference.  Anyway, I am not feeling so hot tonight but I can’t say it wasn’t worth it.  My friend insisted that I confess my sins to my readers.  Everyone slips up, everyone cheats on their diets,  the trick is to get right back on track and not fall back into the cycle of feeling terrible. 

Thursday, January 12, 2012

Gluten Free Apple Pecan Date Breakfast Scones

Hey Everyone!
So sorry for such a long delay between posts! I was away in the sunny Bahamas over the holidays and my blogging sort of fell between the cracks.  Sorry for the lack of photos in this post (for now) I was so busy baking I forgot to take more.  I'll put together another batch so you can see the process soon.


Breakfast has always been a struggle for me.  Making healthy choices and even remembering to eat in the morning has not always come easily. Also being someone who doesn’t like to eat for at least an hour after waking up, I often eat once I get to work.  Having made the switch to gluten free has amplified these challenges as quick gluten free “on the run” options are limited.  I have had some luck with GF cereal from THIS company but I often want something a little more hearty that I can eat while on the move. 
A lot of my recipes on Gluten Free Kitchen Adventures are recipes that I have found somewhat recently or are ones that I have been using for years that I have recently altered to fit a gluten free lifestyle.  This recipe however, is one that I created from scratch one night when I was feeling extra creative.  These “scones” have a texture that is a bit of a mix between a traditional scone and a muffin, moist and dense. 
I have yet to play around with a different flavour, mostly because this one is so delicious and satisfying, so why mess with a good thing.

Ingredients:
¼ cup butter at room temperature
¼ cup brown sugar
1 egg
½ cup milk or substitute
½ cup date paste (directions below)
½ cup grated apple
1/3 cup chopped pecans
1 cup Gluten Free Flour Mix <<LINK>>
1 tsp baking soda
1 tsp baking powder
1 tsp cinnamon
¼ tsp salt

Directions:
Preheat oven to 350
1.       To make date paste, coarsely chop ½ cup of pitted dates and place in a small pot with ¼ cup of water.  Over medium heat, cook the dates until they are quite soft and the water has mostly boiled off .  Remove from heat and allow to cool for about 10 minutes.  Using a fork or a masher (I use a pastry cutter) mash the dates into a smooth paste.
2.       In a large bowl, cream butter, brown sugar and date paste.  When evenly mixed, add egg and stir until incorporated. 
3.       In a separate bowl, mix flour mix, baking soda, baking powder, cinnamon and salt until well combined. 
4.       Alternate adding flour mix and milk in 2 additions to butter mixture.  Add pecans and grated apples stirring gently just to incorporate. 
5.       Line a baking sheet with parchment paper or a non-stick mat.
6.       Using a large spoon or ice cream scoop, drop dough onto the baking sheet.  They don't expand too much so you only need to leave about an inch between them.
7.       Bake for 18 minutes until golden brown on the bottom

This recipe makes about 10 scones.

To freeze scones, line a baking sheet with parchment  then scoop dough as above and place in the freezer for about 2 hours or until solid.  Once frozen, then transfer to a freezer bag and return to the freezer. 
I find these stay nice and fresh for about 3 days after baking so I like to bake off about 3 on Sunday night and another 3 on Wednesday night to get me through the week with fresh breakfast. 


Be sure to vote for the recipe you would like to see next at the top right of the page!

Thursday, December 1, 2011

Gluten Free Fudgy Brownies with a Rocky Road twist!

Sorry for the delay in posting everyone! This week has been so hectic with travel and entertaining that I’ve been neglecting my gluten free readers!

With the cold weather moving in, I have been thoroughly enjoying my comfort food.  Unfortunately, enjoying is also synonymous with over-indulging or as I like to call it, “storing up for winter”. These rich, fudgy brownies are perfect for satisfying those cold-weather cravings. They go perfectly with a mid-afternoon latte or an after dinner hot cocoa (chocolate overload at its finest).

My preference is a moist, dense fudge-like brownie over the cakey alternative.  Many bakers, gluten free or not struggle to achieve that texture and the result is often a moist sponge cake., not a brownie. After many attempts with decent results, I’ve finally engineered what I believe is the perfect fudgy brownie.
                                                       Enjoying one at my desk

*Disclaimer:  If your new year’s resolution is going to be to cut out fatty food, get your fill of these now because they are certainly not diet.  All real butter and sugar here my friends!

Ingredients:
1 cup butter
6oz dark chocolate

4 eggs
1 cup sugar
½ cup brown sugar
2 tsp vanilla
½ tsp salt
1 cup GF flour mix (link)

Directions:
  1. Preheat oven to 350
  2. Place a small pot on stove top with about an inch of water in it and bring to a gentle simmer
  3. In a heat proof bowl, combine butter and chocolate and place over simmering water to melt together
  4. In a separate bowl, whisk eggs until frothy.  Add white and brown sugars, vanilla and salt
  5. Gently mix GF flour and chocolate mixture into eggs just until combined, being careful not to over mix
  6. Pour into  greased and parchment lined 9x13 pan

Bake for approximately 20 minutes (should still be gooey in the center)
Rocky Road Twist

Top brownies with pecans and or marshmallow, toffee, or caramel bits before baking for a delicious twist.  

A delicious frosting recipe from my sister:

Avocado Chocolate Frosting

1 large avocado
1 cup raw cacao powder
1/4 - 1/3 cup raw honey or agave nectar
1 tsp vanilla extract
pinch of sea salt
1 tsp coconut oil (optional)
Smash up the avocado with a fork or masher (I use a pastry cutter) and add vanilla extract, salt and coconut oil (if using)  Then stir in the cacao powder and gradually add the sweetener until you get a good spreadable  frosting texture and it is sweetened to your taste.  Use right away.
Don't forget to store in the fridge!


Brownie for 1 Please!
You know those nights when you’re sitting on the couch watching TV and suddenly all you want is chocolate?   I used to go to the cupboard and get a jar of Nuttella and a spoon to suppress my craving… until I discovered the mug brownie!  
Single serving sized and perfectly moist and delicious!  

  • 4 tbsp gluten-free flour mix
  • 4 tbsp sugar
  • 1 egg
  • 2 tbsp cocoa powder
  • 1/ tsp baking powder
  • 3 tbsp milk or milk alternative (almond, soy etc)
  • 3 tbsp butter or coconut oil (coconut oil has the most wonderful flavour)
  • 1 teaspoon vanilla extract
  • Good pinch of salt
Simply place all ingredients in a large, greased microwavable mug and stir with a fork very gently only until combined.
Microwave on high for 1 minute and check with a toothpick, it should still be moist in the center but not runny.  Microwave for an additional 30 seconds if necessary


Up next on Gluten Free Kitchen Adventures:  Apple Pecan Date Breakfast Scones


Be sure to vote for upcoming recipes in the upper right corner of this page.


Enjoy!