Thursday, December 1, 2011

Gluten Free Fudgy Brownies with a Rocky Road twist!

Sorry for the delay in posting everyone! This week has been so hectic with travel and entertaining that I’ve been neglecting my gluten free readers!

With the cold weather moving in, I have been thoroughly enjoying my comfort food.  Unfortunately, enjoying is also synonymous with over-indulging or as I like to call it, “storing up for winter”. These rich, fudgy brownies are perfect for satisfying those cold-weather cravings. They go perfectly with a mid-afternoon latte or an after dinner hot cocoa (chocolate overload at its finest).

My preference is a moist, dense fudge-like brownie over the cakey alternative.  Many bakers, gluten free or not struggle to achieve that texture and the result is often a moist sponge cake., not a brownie. After many attempts with decent results, I’ve finally engineered what I believe is the perfect fudgy brownie.
                                                       Enjoying one at my desk

*Disclaimer:  If your new year’s resolution is going to be to cut out fatty food, get your fill of these now because they are certainly not diet.  All real butter and sugar here my friends!

Ingredients:
1 cup butter
6oz dark chocolate

4 eggs
1 cup sugar
½ cup brown sugar
2 tsp vanilla
½ tsp salt
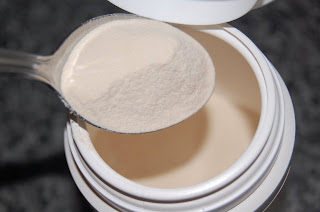
1 cup GF flour mix (link)

Directions:
  1. Preheat oven to 350
  2. Place a small pot on stove top with about an inch of water in it and bring to a gentle simmer
  3. In a heat proof bowl, combine butter and chocolate and place over simmering water to melt together
  4. In a separate bowl, whisk eggs until frothy.  Add white and brown sugars, vanilla and salt
  5. Gently mix GF flour and chocolate mixture into eggs just until combined, being careful not to over mix
  6. Pour into  greased and parchment lined 9x13 pan

Bake for approximately 20 minutes (should still be gooey in the center)
Rocky Road Twist

Top brownies with pecans and or marshmallow, toffee, or caramel bits before baking for a delicious twist.  

A delicious frosting recipe from my sister:

Avocado Chocolate Frosting

1 large avocado
1 cup raw cacao powder
1/4 - 1/3 cup raw honey or agave nectar
1 tsp vanilla extract
pinch of sea salt
1 tsp coconut oil (optional)
Smash up the avocado with a fork or masher (I use a pastry cutter) and add vanilla extract, salt and coconut oil (if using)  Then stir in the cacao powder and gradually add the sweetener until you get a good spreadable  frosting texture and it is sweetened to your taste.  Use right away.
Don't forget to store in the fridge!


Brownie for 1 Please!
You know those nights when you’re sitting on the couch watching TV and suddenly all you want is chocolate?   I used to go to the cupboard and get a jar of Nuttella and a spoon to suppress my craving… until I discovered the mug brownie!  
Single serving sized and perfectly moist and delicious!  

  • 4 tbsp gluten-free flour mix
  • 4 tbsp sugar
  • 1 egg
  • 2 tbsp cocoa powder
  • 1/ tsp baking powder
  • 3 tbsp milk or milk alternative (almond, soy etc)
  • 3 tbsp butter or coconut oil (coconut oil has the most wonderful flavour)
  • 1 teaspoon vanilla extract
  • Good pinch of salt
Simply place all ingredients in a large, greased microwavable mug and stir with a fork very gently only until combined.
Microwave on high for 1 minute and check with a toothpick, it should still be moist in the center but not runny.  Microwave for an additional 30 seconds if necessary


Up next on Gluten Free Kitchen Adventures:  Apple Pecan Date Breakfast Scones


Be sure to vote for upcoming recipes in the upper right corner of this page.


Enjoy!

Tuesday, November 29, 2011

My Happy Place

So the brownie atricle is coming shortly, I promise!  I just wanted to share some photos of my favorite place on earth and where I find all of my delicious ingredients!


Toronto's St. Lawrence Market dates back to the mid-1800s (the current market was re-built in 1850 to replace the previous building which had been deswtroyed by fire)
The market offers an amazing selection of meats, cheeses, fruit, vegetables and any other wonderful thing you could imagine.  I make it my mission to get there every Saturday morning to get the freshest ingredients possible.


The market is located at the corner of Jarvis and Front Street in downtown Toronto.  Open Tuesday to Saturday.

Saturday, November 19, 2011

Gluten Free Cheesy Perogies

Gluten Free Perogies took the win this week! 

Whether you grew up with them or they became a staple in your diet during those lean university years, perogies are the ultimate comfort food. Simple to boil and fry up right out of the freezer, even the most nervous cook can get them just right.  Topped with some bacon, caramelized onions or sour cream you get a warm delicious meal with tons of flavour.

Sadly, this oh-so-easy offering from the grocery store freezer isle does not fit into a gluten free world. My love for these crispy dough pockets filled with cheesy potatoes and  desire to avoid a 2-day stomach ache brought me to the kitchen in search of a solution. 

The dough was a little bit tricky to work out because it took me a few different combinations to get the right texture but I think I’ve nailed it, and to save you the trouble of trial and error, I’ll share.

The dough itself is quite simple. It takes less than 5 minutes to put together and is surprisingly pliable without being sticky.

Here is your list of ingredients:

Dough
1/2 cup corn starch
1 cup white rice flour
1 cup millet flour
1 tsp Xanthan gum
1/2 tsp salt
3/4 cup of milk
2 egg whites

Filling
2 medium potatoes, peeled and cut into 1inch cubes (I like Yukon Gold)
1 tbsp butter
1/4 - 1/3 cup milk
Salt & pepper to taste
(optional additions include: garlic, cheddar cheese, bacon, caramelized onions and anything else you like in your potato)

1 egg white for sealing

Instructions:
To make the dough, whisk all dry ingredients together and then add the milk and egg whites in one addition and mix with a wooden spoon until it starts to come together. The mixture will still look a little crumbly.

Use rice flour to cover your counter and then pull out a big handful of dough. Knead it until smooth and evenly mixed (about 10 times). Roll dough out on a freshly floured surface until fairly thin (about 1/4cm)  and use a big round cutter (I used a martini glass) to make the rounds. Gather the scraps and knead together gently and these can be rolled out again. This recipe makes enough dough for about 15 large rounds.
While you are preparing your filling make sure to store the rounds under a damp dish towel to ensure they don’t dry out.

Next make your filling. Boil potatoes until they split when you poke them with a fork and then mash with butter and milk. Stir in salt & pepper and any of the optional ingredients you wish (I made this batch with cheddar cheese). 

To fill, take one dough round and using your thumbs and first two fingers work like you would with pizza dough. This puts a bit of a pocket in the dough which is helpful for filling. Don’t be concerned if can’t do this part, it’s not imperative for the success of your perogies! 


Place a heaping tablespoon of filling in the center of the round and brush a tiny bit of egg white around the edge. Fold over and pinch the edges together to seal then take a fork and crimp the edge to seal extra tight!

Transfer perogies to a floured non-stick mat or parchment on a cookie tray and pop into the freezer for at least two hours. Once frozen, you can cook right away or place in a bag and return to the freezer. 

Cooking Instructions:

Many people simply boil their perogies and do not explore my personal favorite method of pan frying. Although optional, this extra step gives the dough a lovely crispness which is a great contrast to the smooth potato filling.

From frozen, boil perogies for about 5 minutes.  While boiling, heat and frying pan with about a tablespoon of butter or olive oil and sauté some sliced onions until tender and caramelized.  Use a slotted spoon to remove perogies from boiling water and add to pan.  Fry perogies until browned and crispy, flipping once.


Perogie Cooking Tip for Fewer Dishes:

The only reason I can think of that would cause cooks to skip the pan frying step is the extra dishes involved.

Solution:

To boil and fry in one pan put about an inch of water in a non-stick frying pan with about a tablespoon of butter or olive oil and bring to a boil. Add the perogies and boil uncovered. As the water evaporates, the butter or oil greases the pan and they fry up perfectly!! Takes 12-15 minutes. 


Voila!

Be sure to keep an eye out for the runner-up recipe for Fudgy Gluten Free Brownies, coming soon! Also use the voting buttons above to have your say on other recipes you would like to see here soon.

Happy Cooking!

Thursday, November 10, 2011

Starting Slow with Chocolate Oat Chews

Hey Gluten-Free'ers!


When I first made the decision to cut out the wheat, I took a trip to a fancy health-food store that is known for its fresh baked goods, many of which are GF.  If you have looked at GF products at any grocery store than I'm sure you have realized that they are about 3x the price of their gluten-full equivalent, so they better be good right? That day I purchased several individually wrapped muffins, cookies and a loaf of bread and hoped for the best.  I realized right away that there was something amiss when the cookie I had purchased didn't even make it home in one piece (it had crumbled into sand).  Upon tasting the crumbs, my suspicions were confirmed; the cookie was crumbly, dry and bland.  I knew I could do better.


Whether you've been baking gluten free for years or this is your very first time, one thing is for sure: Everyone loves a really delicious cookie.  I adapted my "Chocolate Oat Chews" from a basic Oatmeal Chocolate Chip cookie recipe that I've been using for years as my first attempt at GF baking .


These cookies will turn out soft, chewy and delicious! Here is the recipe in full and I have added my special tips to the bottom of the blog so make sure you read to the bottom before you make them J


Chocolate Oat Chews


"Wet Ingredients"
1 cup Butter (room temperature)
1 cup White Sugar
1 cup Brown Sugar
2 Eggs
1 tsp Vanilla


"Dry Ingredients"
2 cups GF "all purpose" mix
1/2 cup Oat flour (simply blend 1/2 cup oats until fine)
1 1/2 cups Gluten Free Oats
1 tsp Baking Powder
1 tsp Baking Soda
1/2 tsp Salt


1 1/2 cups Chocolate Chips (I REALLY like these )


Directions:


1. Set oven to preheat to 375° F and line your cookie sheets with parchment paper or silicone mat if required. (I like this at the beginning of recipes because my oven can take a while to heat up)


2. Cream the butter and sugar together.  This is very easy when the butter is at room temperature and can be done very easily by hand or with the paddle attachment of your stand mixer on a low/medium speed.


3. Add the eggs and vanilla. Mix to combine.


4. In a separate bowl, mix your dry ingredients (GF "all purpose" mix, oat flour, oats, baking powder, baking soda and salt). I often do this with a whisk.


5. Mix dry ingredients into wet ingredients in 3 additions being sure to only mix until combined (over mixing when it comes to any kind of baking results in overworked "tough" baked goods.


6. Stir in chocolate chips (again, mix only enough to get them somewhat evenly distributed throughout the dough). This should be your result: delicious, sticky, hearty dough.


7. Roll cookies into balls and place on lined cookie sheet. Consider putting them into the freezer for 10 mins (see Tip #1). Remember that at this stage you also have the option to save some dough for baking later (see Tip #2).


8. Bake for 10-12 minutes.


Tip #1: I like my cookies to be thick and chewy. In order to achieve this I roll my dough into balls (slightly smaller than a golf ball) and place them on my cookie sheet (covered in parchment or a non-stick silicone mat). Next I put the whole thing in the freezer for about 10 minutes to chill.  This will prevent the cookies from spreading out too much in the oven and will give you a nice moist center while still having a crispy base and edges!


Tip #2: Freezing for Later


If, like me, you live alone and don’t really want 30 cookies hanging around your house all at once to either go bad or (more likely) be eaten all at once, there is a simple solution!  Roll all your cookies into balls like usual but leave the ones you want to store for another day in the freezer for about 2 hours. Once completely hardened, you can simply pop them into a freezer bag and return to the freezer for up to 2 months.  To bake, place a few balls of frozen dough on a lined baking sheet and allow to thaw while your oven preheats (10-15 minutes) then bake for about 12 minutes for fresh cookies any time!


Be sure to vote for the recipe you would like to see next at the top right corner of the page! Also I would love to hear about how this recipe worked in your kitchen so please leave me feedback in the comments section below.

Enjoy and Happy Baking!

Tuesday, November 8, 2011

My first blog ever... An Introduction to Gluten Free Baking and the Basics

Hi Everyone! 
My first ever blog, pretty exciting!  I have been toying with the idea of starting a blog for quite some time now but never did it because, well, blogging looks like a lot of work and I would much rather spend my time in the kitchen.  Recently, an overwhelming number of requests for recipes and help on my facebook page has caused me to reconsider my previous stance on blogging.  It seems like everyone has questions about gluten free these days, so I'm going to do my best to help. 
As a disclaimer, I have no formal culinary training so I will never claim to be an authority on any cooking related matter.  What I do have is a love for food (especially baking) and tons of personal experience in the kitchen.
Like many people, I grew up with a mother who baked regularly and always encouraged my sister and I to help.  To this day, I still cannot make a pie crust that compares to hers and which she claims cannot compare to that of her mother's.  Rather than fruit snacks, Oreos and Wonderbread sandwiches, our lunches were filled with homemade cookies and brown bread.  A labour of love by our mother that I didn't learn to appreciate until much later in life. 
Having made the switch to gluten free only 5 months ago, this is still very new to me so I'm learning as I go.  Through trial and error, I have quickly become comfortable working with the different flours, learning to compensate for their strange textures and you can too!
I'm devoting this, my first blog, to some of the basics of gluten free baking. 
Tip #1: A stocked pantry is the key to success!  You won't be using just one kind of flour anymore.
Here is a list of gluten free flours that I have come up with to get you started:


Rice

Cornflour
Sorghum

Potato 
Millet

Quinoa
Amaranth

Tapioca
Arrowroot

Chia
Buckwheat

Chick pea


*Oats/ Oat flour are also considered gluten free as long as they are processed in a wheat-free facility.  Bob's Red Mill sells great GF Oats


You won't need all of these flours to start (or possibly ever) but it's good to know what is, and isn't, gluten free. This will help you when reading labels at the grocery store... something else you will have to get used to.
Right now, in my cupboard, I have Rice flour, Sorghum flour, Millet flour and Chick pea flour and those have been working well.  The only other flour that I have worked with so is Arrowroot and I must say, it was not my favorite.  I was very excited to try Arrowroot flour because of my positive associations with the "Christie" brand Arrowroot cookies that I have loved since I was a kid but in my initial experiences with it I have been let down (see below).  

Tip #2: Foreign ingredients like Xanthan Gum are your friend and become an everyday staple.
Xanthan Gum is a fine white powder used as a food thickening agent and helps create that chewy, sticky texture that real flour has. Xanthan is quite expensive but a little goes a long way so if you can find it in a bulk store you can start with just a little. When I first started using it, I looked up what it was made of and stopped when I saw "derived from the bacterial coat"  in the first sentence.  Let’s just say, it comes from a leaf so it's natural and it stops your cookies from crumbling and not worry about it.


Tip #3: You can fake “all purpose” flour to sub into your current recipes.  It will never have the same texture as what your are used to but it will get you close.
Each recipe varies but the "all purpose" flour mixture that I have been using pretty consistently is:
1/2 cup White Rice flour
1/4 cup Millet flour
1/4 cup Sorghum flour
1 tsp. Xanthan Gum
*makes one cup, multiply as needed
My first ever gluten free baking attempt was:
                                                     Chocolate Oat Chews
                                                    *recipe coming soon

This is a great example because with my favorite "all purpose" mix, these cookies are chewy, oaty and flavourful but when the Millet flour in the mix  was substituted for Arrowroot, they tasted like metallic chemicals.  I am in the process of testing Arrowroot flour with other recipes to see if it was specific to this recipe or if, in general, I don't care for Arrowroot. The lesson here is that all of these alternative flours are different and you have to experiment with them to get it right. That is what this blog is all about, trial and error. Hopefully more delicious successes than metallic failures.
Tip #4: You cannot use just one kind of flour.
From all of the research I have done, the one thing that remains consistent in GF baking is that you cannot use just one flour.  For example, if you were to just use rice flour, your dough would come out something like paste and just Sorghum would be very grainy. When combined however, the textures of each flour come together to compensate for each other and round out the mix, making it as close to the texture of traditional flour as one could hope for.
Tip #5: Where to buy
I am very fortunate to live near the St. Lawrence Market in Toronto where there is a great variety of ingredients at my disposal.  One stall in particular at the market sells only flour, every kind you could ever think of, cheap and in bulk.  Health food stores and bulk stored often have many of these ingredients available and I’ve even had some luck finding rice flour in the bulk section at the grocery store.  When shopping, bulk is almost always more cost effective. 
I hope you have found this information helpful, now go out and stock that pantry so we can start baking!
Coming soon on Gluten Free Kitchen Adventures- Recipe and Tutorial for my “Chocolate Oat Chews”